webpadlock
Web Padlock
This project can be used to deny access to a system from unknown devices.
It has two parts:
- Local service. Must be running locally on all devices. Create a token.
- Remote server. Must be running in the system to be protected. Validate the tokens.
More about them below.
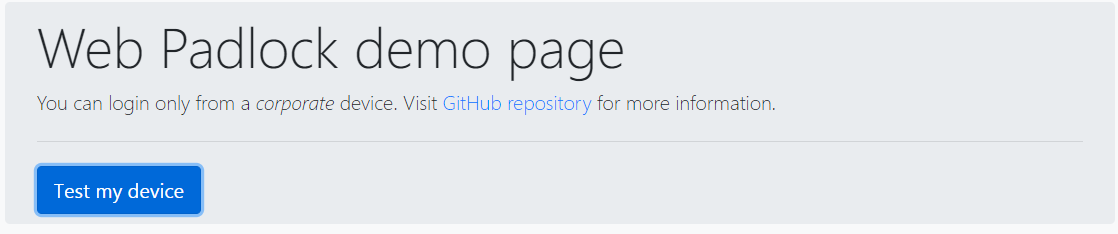
Public demo
If you only want to try this software and you are using Windows or Linux, just download the latest release.
If you are using Mac, please download the code and follow the instructions in Local README running from source.
You will need:
- server.exe: local agent.
- config.json: configuration file
- workstation001.key.pem and workstation001.key.pem example host certificates.
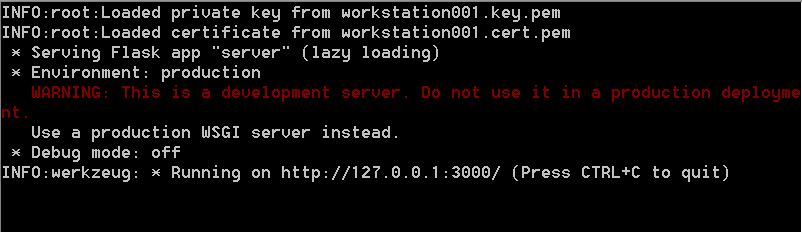
Put all the files in the same folder and run server.exe. The output will be similar to this:
To check the local agent, navigate to http://127.0.0.1:3000/. The server will return some metadata:
{
    "name": "Web Padlock",
    "tokenid": "rEtgnDnKyktoegQhrcBTpNKcMFBKsepKqyNIGviF",
    "version": {
        "mayor": "1",
        "minor": "0"
    }
}
Now visit the public demo server at https://webpadlock.herokuapp.com/ and press the Test my device button.
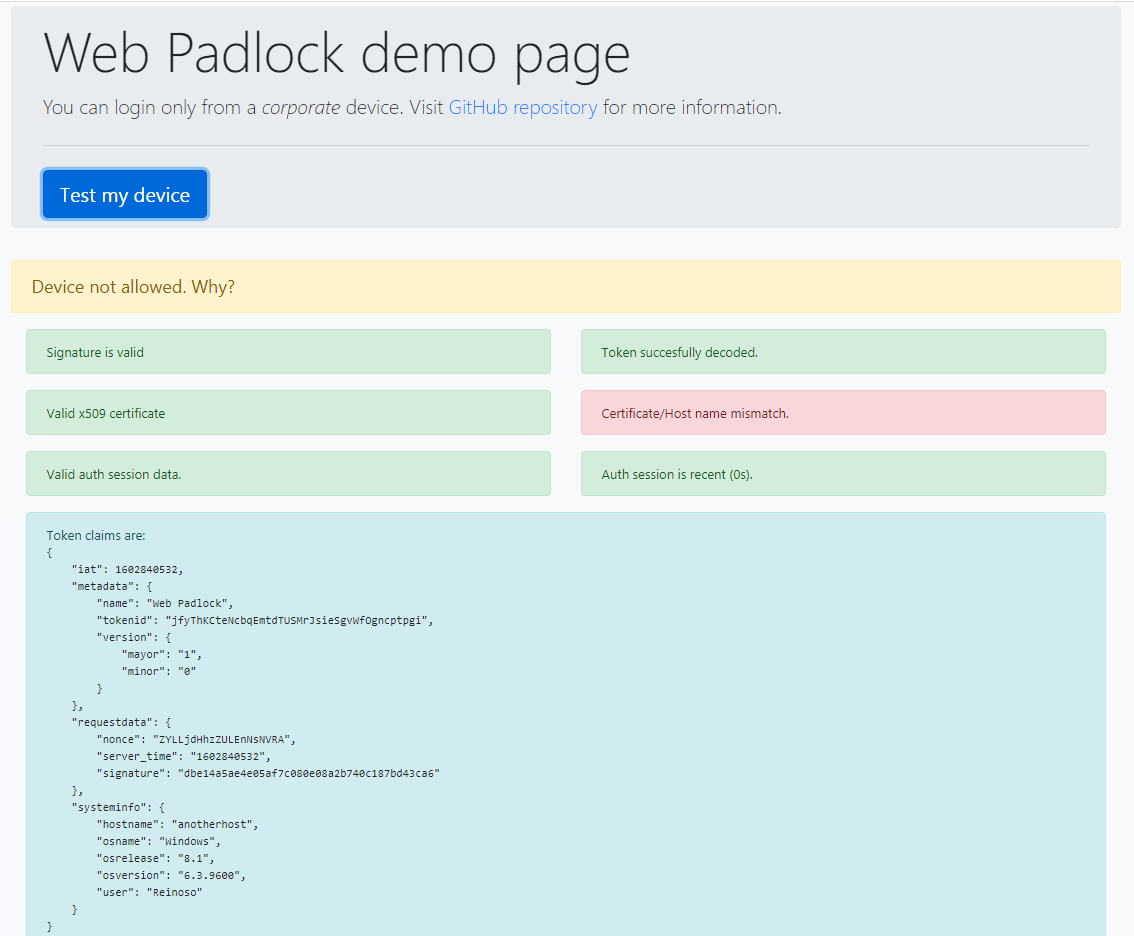
The output will be Device not allowed. Because of
WARNING: Certificate/Host name mismatch.
Fair enough, the example certificate does not match your hostname. But the token claims are displayed anyways.
If you want to dive deeper, you can run a local instance of the remote server, setup your own CA and the appropiate certificate for your hosts.
Description
Local service
The key piece of this software is a private key and its x509 certificate, signed by some internal CA.
Each device must have its own certificate. Since the CN must be equal to the hostname. Ideally, the key must not be exportable. To prevent that, you can use some sort of Management Software, system permissions or hardware TPM.
The local server creates a token with information about the host system, software metadata and a copy of all request parameters. The token is then signed using the certificate’s private key. And the certificate itself is added to the x5c header.
Please see Local README for a more detalied explanation.
Remote server
The remote server validates the token signature using the device’s x509 certificate present in the token itself.
Then it ensures this certificate is valid and signed by our CA.
After that, it serachs for a stateless session in the token. If it is present, it also check its signature and calculate the elapsed time.
The output of the API is a JSON with all the information. The remote access control system can use this jsno to make aditional compliance checks. Like:
- The host name in the token claims matches with the CN.
- The certificate is valid
- The timing is short enought
- Wether the operating system is approved or not.
For more information read Remote README.
Local run
Clone the repository. Install requirements listed in local/remote READMEs.
Local server
Browse the local folder of the repository.
First you will need a certificate with your host name.
To try only in one device you can create a self-signed one and also set this as the CA certificate in the remote server.
If you want to try more than one device, you will need a private CA. Issue one certificate for each device and set the common root as CA in the remote server config.
Self signed example for a host named myhostname:
$ openssl req -new -newkey rsa:2048 -days 365 -nodes -x509 -keyout myhostname-key.pem -out myhostname-cert.pem
Generating a 2048 bit RSA private key
...
Common Name (e.g. server FQDN or YOUR name) []:myhostname
Email Address []:
Command line client
To test the configuration and get a token you can use the command line interface:
$ python get_token.py
INFO:root:Loaded private key from ../hostname-key.pem
INFO:root:Loaded certificate from ../hostname-cert.pem
DEBUG:root:Claims:{"iat":1602528143,"metadata":{"name":"Web Padlock","response-id":"TIyEbOAuIYjvMfnXInhsxCRLBeixyTndPRJufSsv","version":{"mayor":"1","minor":"0"}},"requestdata":{"requestId":"f01253ff497eae7fa1555c34a822c2498835c58b"},"systeminfo":{"hostname":"hostname","osname":"Windows","osrelease":"8.1","osversion":"6.3.9600","user":"Reinoso"}}
eyJhbGciOi...M9ZNAZOFGo2DRMkCJfTQ
Online local server
To run the local server use the command
python server.py
Remote demo server
Located in the folder remote of this repository.
Command line interface
If you want to test some previously saved tokens you can use the command line validator check_token.py.
$ python check_token.py testtoken.dat
INFO:root:Decoding token ok
WARNING:root:Certificate verification failed: [18, 0, 'self signed certificate']
WARNING:root:Certificate/Host name mismatch.
Token claims:
{
    "metadata": {
        "name": "Web Padlock",
        "response-id": "ETBJNxjjGYosSbdOMfiuxVLDwUlICDKMIFlToulH",
        "version": {
            "mayor": "1",
            "minor": "0"
        }
    },
    "requestdata": {
        "nonce": "f01253ff497eae7fa1555c34a822c2498835c58b"
    },
    "systeminfo": {
        "hostname": "myotherhostname",
        "osname": "Windows",
        "osrelease": "8.1",
        "osversion": "6.3.9600",
        "user": "Reinoso"
    }
}
Online remote server
To run the demo server use the command server.py. Check (remote/README.md) for requirements.
Navigate to http://127.0.0.1:10000/
If you change the domain (or use localhost instead of IP) don’t forget to it to the allowed requesters in local service configuration.
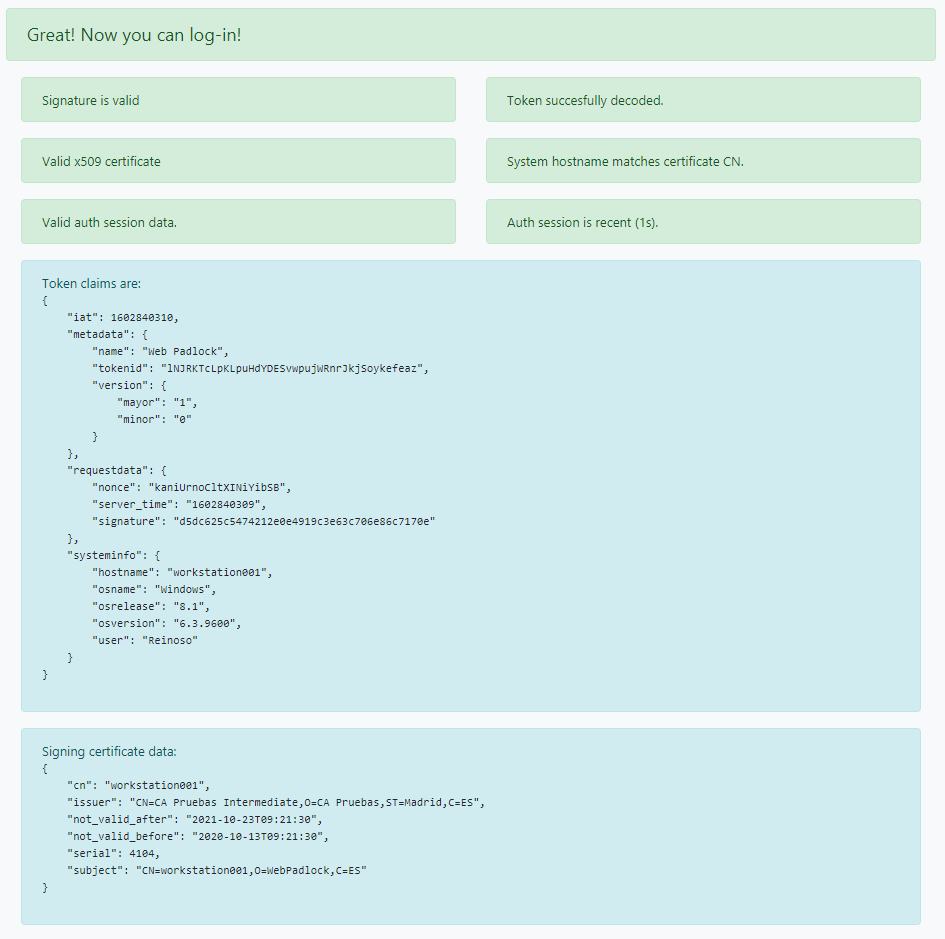
Testing
Run both local and remote servers. Open http://127.0.0.1:10000/.
If all goes right a message like this will appear when you click test-me:
Distribution
To create a release from the python code use:
pyinstaller.exe --onefile .\server.py